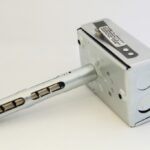
Installed in air ducts worldwide, Firestat duct controls shut down HVAC equipment when air temperature exceeds a pre-set limit. Firestat switches are indispensable in specialized HVAC applications and Building Automation Systems. These simple controls are just as simple to install. Keep reading to learn how to do Duct Limit Control Installation with your Firestat.
How to Install a Firestat in HVAC System
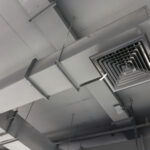
You will need to install one or more Firestat in duct work located at critical temperature locations. For example, downstream from electric heaters or points where duct work is in close proximity to flammable materials.
Firestats may be used in low voltage or line voltage circuits. They are often wired to be open circuit to both heat source and blower when duct air temperature exceeds the temperature setting. If more than one Firestat is connected to control a single heat source, the Firestat must be connected in series.
Steps for Easy Installation
- First, adjust the temperature dial to your determined temperature.
 Second, install the Firestat into the air duct system downstream of air flow.
- Finally, wire the Firestat to your fan.
View the wiring diagram for more help, click here.
How to Determine your Temperature Setting
Once you have the installation ready, you should determine what temperature setting works best for you. Determining your temperature setting is actually quite easy. Our Firestat switches come in both adjustable and fixed temperature models. However, you may not know what temperature you need in the first place.
The temperature you’ll need your Firestat to be set at depends on how close you place it to your furnace and how hot your furnace runs. Our lowest fixed temperature switch is set at 125°F, but the air right next to your furnace might be warmer than that. We recommend that you identify where you plan on installing your duct limit switch before you buy it and measure the air temperature when your furnace is running. Once you know that temperature, add about 40°F and that’s what you should set your switch at. That gives you plenty of leeway for temperature to fluctuate without shutting your system down while still making sure that things don’t get too hot.
How to Adjust
The steps for adjusting the temperature is quite simple. You will need to:
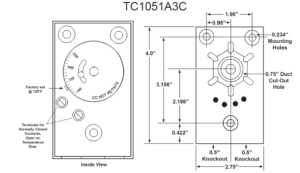
- Remove the cover
- To do this, you will need to push in on the sides of the switch and then pull off the cover. This will reveal the inner workings of the switch.
- Adjust the dial to the desired set point
- To adjust the temperature, simply loosen the screw and move the selector to the appropriate temperature. The temperature can be set from 100F to 250F. One you have moved the selector to the desired temperature, tighten the screw.
- Replace the cover & Install
- Return the cover back to the switch and install into the system.
When the temperature switch leaves our facility it is factory set at 125°F, but has an adjustable temperature of 100°F to 250°F.